A “white plate” is a specific kind of printing plate where an image or outline is printed white on your label to give opacity to parts of the metallic or clear label material. The process of printing white to transparent materials is called white underprinting. Below is a step-by-step guide for creating a white plate in Adobe Illustrator.
Making a White Plate When Printing on Metallic or Clear Stock
Note: The white plate is made on a separate layer on top of your artwork. When completed, a copy should be made of the white plate layer and moved below the art to show it separately for proofing.
1. Identify which elements of your label design you want to be backed by white.
2. Setup your file in Illustrator.
- Make a new layer and call it “White Plate.”
- Make a spot color swatch and call it “WhiteInk.”
- Make a spot color swatch and call it “Material.”
3. On the White Plate layer…
- From your original artwork Select and Copy the elements you want backed by white.
- Copy and lock the original layer.
- Select the White Plate layer and paste in front.
- Remove any Overprint Attributes.
4. Take those elements you just pasted, and fill them with the WhiteInk spot at 100%.
5. Check your work by turning this layer on and off to make sure you have all the elements you need.
Example of a White Plate layer in Illustrator:
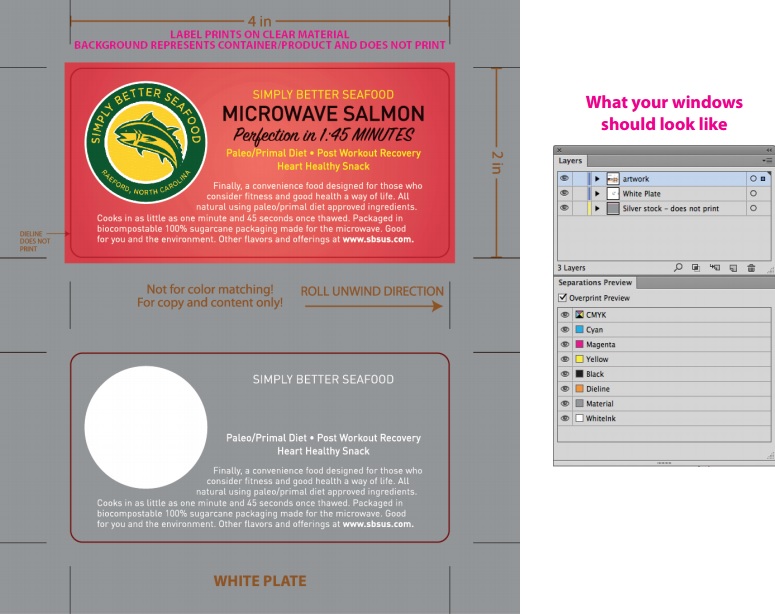
Note: The grey around the label design represents the material – not a color that will be printed.