Convert Text to Outlines Before Submitting Artwork
Converting text to outlines before sending your artwork to us better ensures that your labels turn out how you expect. While we do keep an extensive library of fonts on hand, it’d be impossible for us to have them all. If you design your label with a font we don’t have and send your label artwork to us without having converted the fonts to outlines, the missing font will automatically be substituted by Illustrator. This means your finished label artwork will look different than you originally designed it.
Fortunately, converting text to outlines is a very simple process. Before you follow the steps below, you’ll want to make sure you save a separate copy of your file as a working backup. Also, make sure you spell check your text first!
Click-through Instructions: Edit > Check Spelling
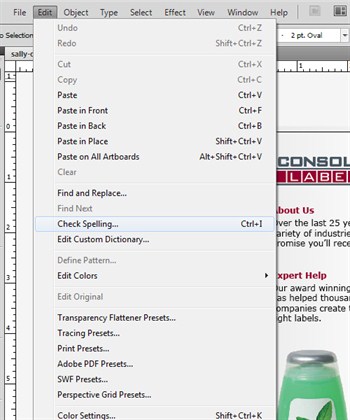
Select “Check Spelling” in the “Edit” drop down menu before converting text to outlines.
If you’re a graphic designer designing a label for a client, it may be helpful to have your customer approve the text and layout before you convert to outlines. This will save time if you need to edit the text. Converting font to outlines will permanently change the text to shape objects, rendering your text un-editable. Please follow the instructions below to convert fonts to outlines.
Click-through Instructions:
- Select > All
- Type > Create Outlines
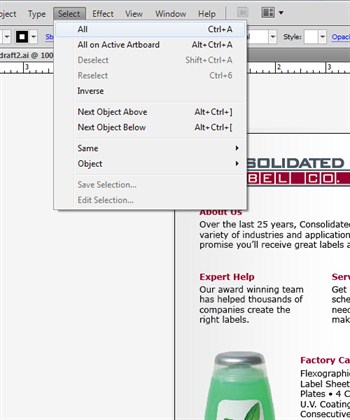
1. Click “All” in “Select” drop down menu before converting.
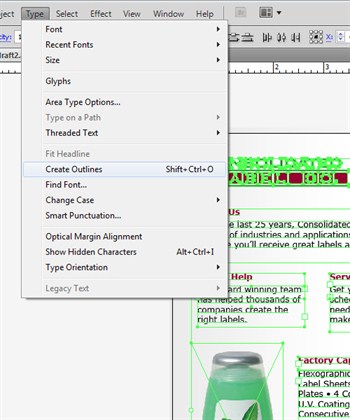
2. Select “Create Outlines” in “Type” drop-down menu and you’re done!