How to Create a ‘Bleed’ on Artwork
A ‘bleed’ means that your label artwork extends beyond the label’s parameter. When your label artwork is set up this way, there will be no white borders around your label art when it’s printed.
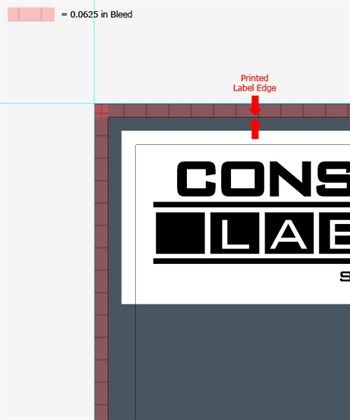
To set up your document with a bleed is easy. Simply make images and graphics extend past all edges of your label design by an additional 1/16″ (0.0625). It may help to have a box set up behind your finished label size for reference.

The red area shows the bleed.
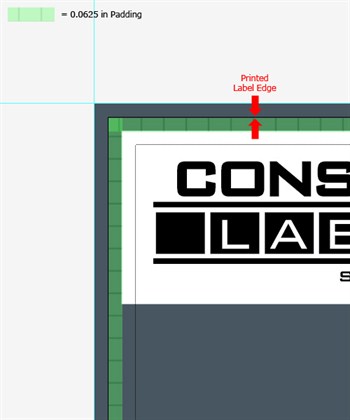
To make sure your text and images aren’t cut off, check and see if all of the images and text are 1/16″ (.0625) away from the edge of your label’s finished size.

The green area shows the padding.
Padding goes completely around the artwork and is the space inside the label’s borders from where the artwork ends to the label’s edges. Note: Padding isn’t required and is usually done for aesthetic purposes (e.g. borders around a label’s perimeter).


