Setting Up a Document in Illustrator
Document setup is important for getting your label artwork right from the start so we can print your labels quickly and accurately. Pixels per inch (PPI) is the number of pixels contained within a vertical or horizontal inch of an image. PPI and DPI (dots per inch) are closely related except PPI is used to measure images on an electronic screen and DPI is used to measure printed images. In this article, we’ll walk you through the basics of setting up your Illustrator document for printing labels.
Include .125″ (1/16th inch for each side) bleed for all images
A ‘bleed’ means that the edges of your artwork extend beyond the actual dimensions of your label. When your label artwork sets up this way, there will be no white borders around your label art when printed. To set up a bleed in Illustrator, you can add a shape around your desired finished label size that is .125″ larger than your finished label size. So if your label is a 4 x 4 in. square, you will create a box outside this square that is 4.125 x 4.125 in. Make sure your artwork extends to that edge, keeping graphics and text inside the finished label area.
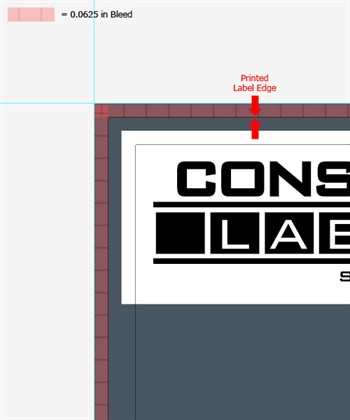
The red area shows the portion of artwork that is considered bleed.
Use Guides
Guides are a must for your document setup. They can help keep your artwork placed and aligned where you’d like. In Illustrator, you drag guides from the ruler.
Click-through Instructions: View > Rulers > Show Rulers
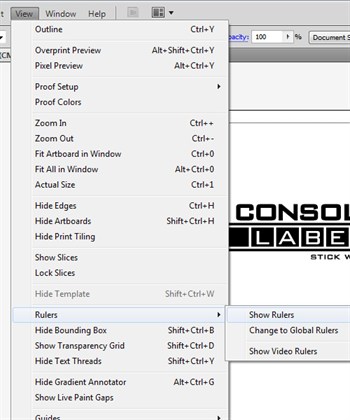
Turn on Rulers
Click on the ruler and drag down/across to the desired position. You’ll see a guide has been created which you can use to line up and place your artwork.

The blue lines are guides.
Use CMYK Color Mode
Illustrator will frequently default to RGB color mode because a computer monitor uses RGB (red, green and blue) to display colors. However, CMYK is the standard for printing. CMYK combines inks in four colors (cyan, magenta, yellow and black ‘key’) at different levels to achieve a wide spectrum of colors. All printing processes rely on CMYK inks – also known as four-color process. Please follow the instructions below to convert your Illustrator label artwork to CMYK.
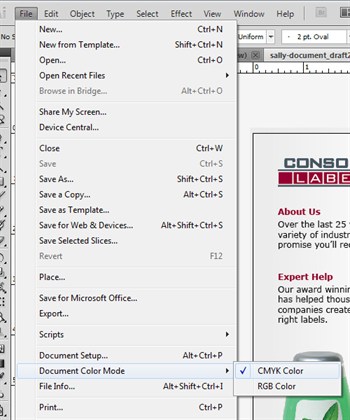
Click-through Instructions: File > Document Color Mode > CMYK
Set Raster Image Resolution to 300 PPI
If you’re placing photographs or scanned images into your label artwork, it’s essential that they are high enough resolution for printing. Images you find on the internet will not be high enough quality to print clearly. This also applies if you’re creating a background layout for your artwork in Photoshop.
Set Raster Effects to 300 PPI
In Illustrator, make sure any effects applied to your artwork (e.g. drop shadows) are set to print at the correct resolution.
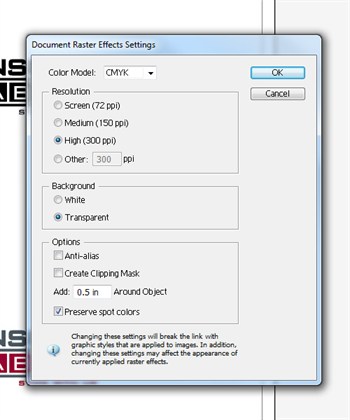
Click-through Instructions:
- Effects > Document Raster Effects Settings.
- Color Model > CMYK; Resolution > High (300ppi)
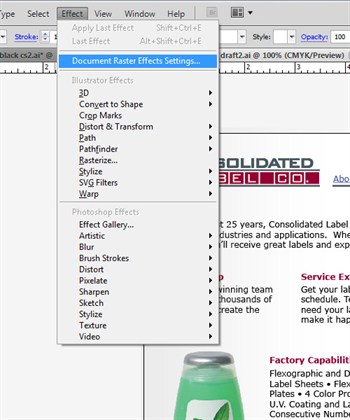
Next, set up the ‘Document Raster Effects Settings’ for printing
Save two copies – a working copy and a final copy.
Keeping two copies of your label artwork can save you time, but making sure we always have the correct and usable version of your artwork. Finish creating your label artwork, and save that file as a .ai (Illustrator) file. Then, convert all fonts to outlines and save this as another copy of the file. Send us the converted file to guarantee fonts are printed how you’d like them. If there are revisions to your artwork, you can then use your .ai file to edit text and images, repeat the procedure to overwrite the old converted file with your new revisions, and submit the converted copy to us.
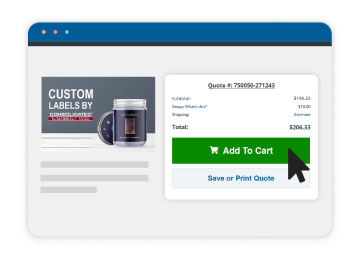
Start on your labels with our instant online quote tool! For more information, please call 1-800-475-2235 or email sales@consolidatedlabel.com.