After finding the perfect bottle for your product, the next thing you will need to complete your product packaging is custom labels. Selecting a bottle label size is an important decision because it affects label artwork, cost, and even application. In this guide, we’ll explain how to get a label size that works for your bottle type to achieve the label and packaging look you want.
Round Bottles
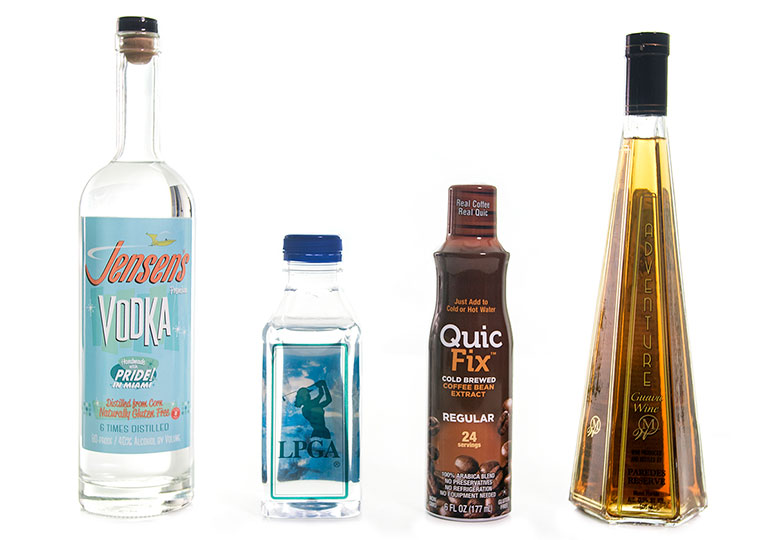
When labeling a round bottle, you have some flexibility with the wraparound size of your label because you can have your label wrap completely around the circumference of the bottle so the label edges overlap or you can allow a gap between the label edges. The height of your label, however, usually has less leeway – you must evaluate only the truly “flat” parts of the bottle’s sides and where the “shoulder” of the bottle starts. This is especially important if the bottle has ridges and therefore a smaller labeling area (e.g. water bottles).
There are several ways to measure the label width for a round bottle:
- Option 1: Take a measuring tape and wrap it around the bottle’s circumference to determine the width.
- Option 2: If you don’t have a measuring tape, measure the bottom face of the bottle from one side to the other with a flat ruler. This is your bottle diameter. Next, multiply the diameter by pi (3.14), and the resulting number is your circumference and the width of your label.
- Option 3: Another way you measure the width is by using a sheet of paper. Simply wrap the paper around the bottle and mark where it overlaps with a pencil. With a ruler, measure the distance between the end of the paper and the mark to determine the label’s width.
How to measure the height of a round bottle:
- Measure the height of the flat surface, from curve to curve. This is the height of your label.
We recommend taking off between 1/8th to 1/4th of an inch from the width so there’s a gap between the ends of the label when it’s applied to the bottle, as well as, 1/8th of an inch from the height. By slightly decreasing the bottle label size, you won’t have to worry about lining up the ends perfectly (especially if the application process is being done by hand) and it prevents the label from being too tall for the bottle’s application surface. If you would like the label ends to overlap, however, all you need to do is add 1/4th of an inch to the width.
Our label size calculator for round bottles is a great way to determine bottle label size.

Square Bottles
Since most bottles are round, one way to stand out is with a square bottle for a modern, geometric look. With a square bottle, you can either have your label wrap around like you would a round bottle or you can label 1-2 panels (e.g. front panel for the logo and product name, back panel for Nutrition facts and barcode).
How to measure the width of a square bottle:
- If you want a label that wraps around the bottle, take a measuring tape and wrap it around the bottle’s circumference – this will be your label width. If you don’t have a measuring tape, use the paper/ruler method: wrap the paper around the bottle and mark where it overlaps with a pencil. With a ruler, measure the distance between the end of the paper and the mark to determine the label’s width.
- If you want to label only a side of the square bottle, measure the width of the flat panel where the label will be applied. This will be your label width.
How to measure the height of a square bottle:
- Measure the height of the square bottle’s flat panel. This is the height of your label.
Tapered Bottles
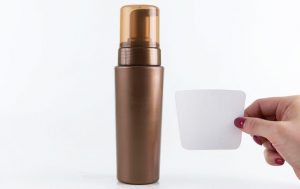
“Tapered” refers to a bottle that changes dimensions from one end to the other, whether it’s narrow on top and gradually widens towards the base or vice versa. To determine if your bottle is tapered, simply take something that has a straight-edge, such as an index card or ruler, and place it alongside the container’s edge. If you can see a gap between the straight edge and the container, the bottle is tapered. Tapered bottles can require more advanced tools of measuring which is why we recommend sending a sample bottle to our customer service department to guarantee an accurately sized label.
If you have a tapered bottle or you would like to label an area that tapers (e.g. a wine bottleneck), there are a few things you should know:
- Applying a rectangle label on a tapered area can cause issues like flagging (edges lifting up), bubbling, and creasing because it can’t lay flat against the bottle’s surface.
- There are three things we can do to ensure a smooth label fit: cut the label with a curve, go with a smaller sized label, or print shrink sleeve labels for full-body coverage.
- Clear or white film is typically recommended for labeling a tapered container since its flexibility helps ensure a smooth application.
Check out our labeling tips for tapered containers video for more information.

Unusual Shaped Bottles
If your bottle has curves, corners, bumps, or anything else that makes it unusually shaped, finding a bottle label size can be tricky. An unusually shaped bottle is already eye-catching so you may not want to have such a large label that it ends up covering or distracting from the bottle shape. Depending on the shape, it might also be hard to apply a label to the bottle because curves can cause the label to flag so that’s another consideration.
Once you’ve decided what kind of packaging look you want, measure the area on the bottle where the label will be applied and that will be your bottle label size. If your bottle doesn’t have a flat surface, you can apply the same labeling tips for tapered containers to your bottle. One option we recommend for unusual shaped bottles is to use shrink sleeve labels. These full-body labels offer 360-degree graphics coverage and can conform to almost all bottle shapes for a visually striking look. Check out our shrink sleeves guide to see if they’re right for you.
If you need help selecting a bottle label size, we would be happy to help. We’ve printed labels for all sorts of bottles and our experienced team can make recommendations for your product so you don’t end up with the wrong label size.


